Map Configuration
In addition to the traditional view of each controller which shows which zones of that substation are operating, Irricloud supports a map-based graphical view of multiple systems at once. At a glance you can observe if controllers are watering and if any sensors are above or below their trigger points. Through the map interface you can also get details of current per zone watering with the controller or current sensor values and turn of and off different zones.
Enabling Map View
Map view is enabled by clicking Map View on the Home Page:
![]()
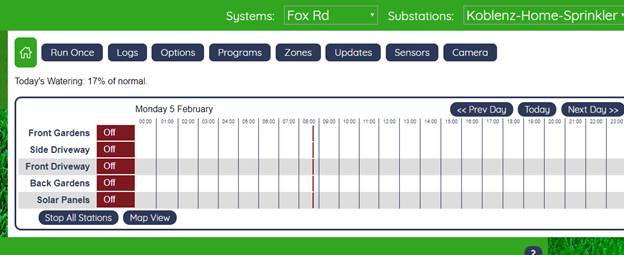
Map View brings up a map that is specific to the user that is logged in. Changing the map by zooming in or out or repositioning the map will be saved so that future Map Views will remember the user preferences. You can exit Map View by clicking Traditional View.
Creating Map Points
Each point on the map is associated with one Irricloud controller and references zones and sensors associated with that controller. One might have a point on a map that refers to all of the zones and sensors for a given controller. Alternatively, one could create many map points with each zone (or set of zones and sensors) of the controller associated with distinct map locations.
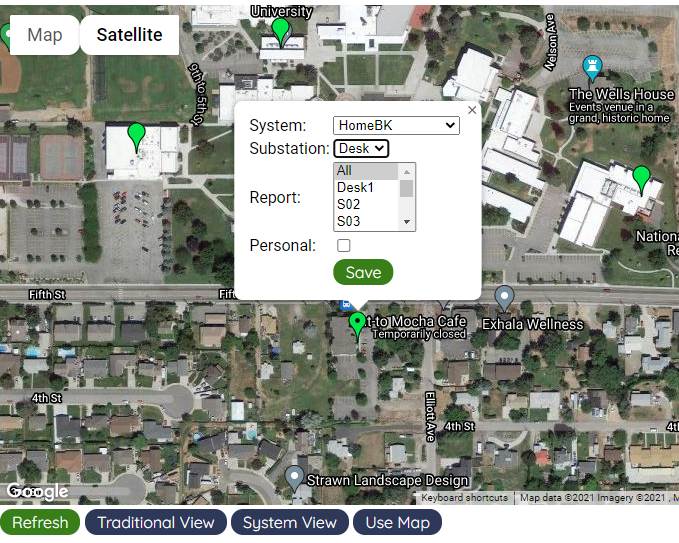
The button Configure Map allows you to add, move and remove map points, while Use Map allows you to observe and control zones for the points you have already established. When you are configuring the map, you can place points on the map by double-clicking on the map where you want your controller located. When you double-click a pop-up box will allow you to select which system (of all the systems to which you have access), which controller within the system, and which set of zones and sensors within that controller you are interested in tracking.
If you do not have administrator privileges for a given system then you must check the Personal box when creating the map point. Selecting the Personal box will make the map point available only to you. If you do have administrator privileges for a given system and the Personal box is not checked, then the map point created will be associated with the system and all users that have access to the system will see the map point.
Clicking Save will save the location on the map.
In order to delete a map point, make sure you are in map configuration mode and right-click (or double-click) on the location and you will be asked to confirm that you really do want to delete the marker.
Moving a map point is accomplished through a typical drag and drop process.
Using the Map
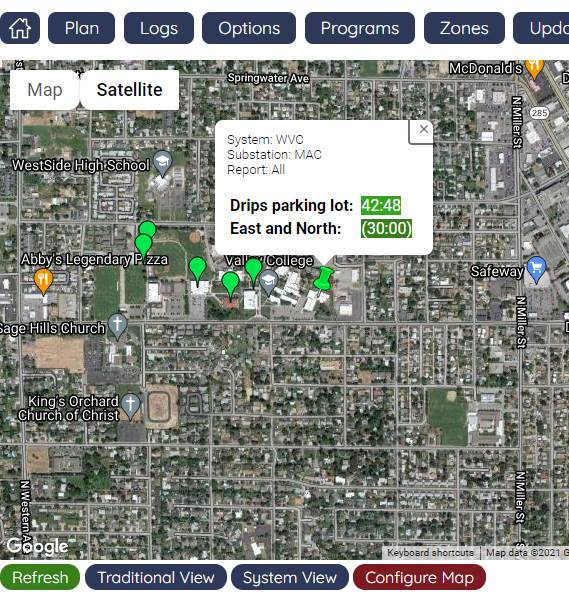
Hovering or clicking on a given map point will show the state of the zones and sensors associated with that location. Non-operating zones are not displayed.
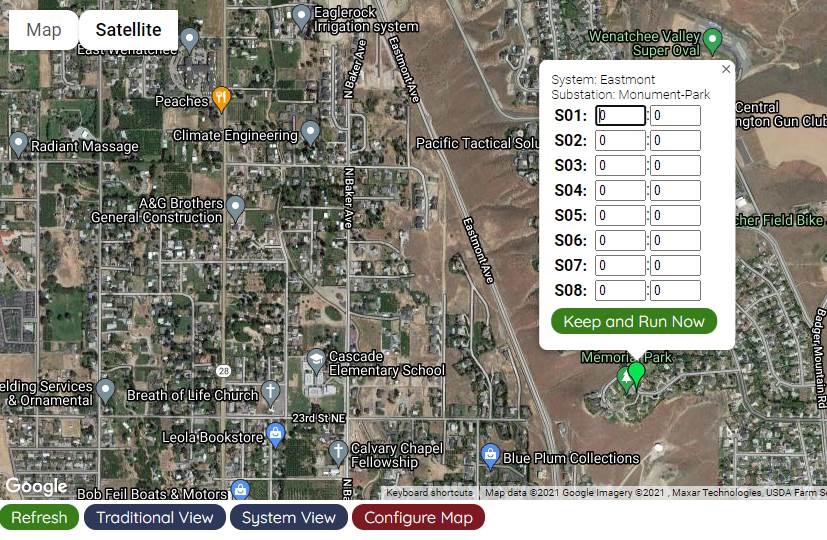
Double clicking on a map point brings up a box that allows you to select zones to stop, or provide runtimes for zones to run. When starting zones, any existing zones that are running continue to operate.
Changing and Saving Maps
The width and height of the map can be changed as long as the map is not Locked to a system. A small red square appears at the bottom right of the map and that square can be dragged to change the size of the map.
There are a couple of ways that a map can be saved. Lock Map to System will save the maps size and location to the current system being viewed and other users will also get that map. Unlocking the map then allows the map to revert to its default size and each users map view will be unique.
Clicking Save Map Parameters will save the current map zoom, position and size for a user but will not associate that map with a system.
Map Icons
The icons used for each map point convey high level information associated with the station. More detailed information associated with the station can be accessed by hovering over the point of interest. Each time you move the mouse away from a map point and back to it, the data will be refreshed.
The following icons are used:
![]() This
icon is typically displayed when a station is unreachable or the user does not
have the privilege to look at the data.
This
icon is typically displayed when a station is unreachable or the user does not
have the privilege to look at the data.
![]() This
icon indicates that everything is ok with nothing to report.
This
icon indicates that everything is ok with nothing to report.
![]() This
icon indicates that everything is ok, but there is normal sensor data or
watering occurring that can be observed by hovering over the station.
This
icon indicates that everything is ok, but there is normal sensor data or
watering occurring that can be observed by hovering over the station.
![]() This
icon indicates that a sensor is below its low threshold setting. Specific data
can be observed by hovering over the station.
This
icon indicates that a sensor is below its low threshold setting. Specific data
can be observed by hovering over the station.
![]() This
icon indicates that a sensor is above its high threshold setting. Specific
data can be observed by hovering over the sensor.
This
icon indicates that a sensor is above its high threshold setting. Specific
data can be observed by hovering over the sensor.